1.26.2014

032 Turkey + Tomato + Avocado + Cottage Cheese + Egg Sandwich

I love following food blogs as much as the next 20-something who spends too much time on Pinterest, but it can be challenging sometimes. Many of the recipes call for ingredients I don't have at home, or ones that I'll buy for the dish and probably never use again. I have lost track of the number of spice bottles and the tubs of sour cream/plain Greek yogurt I've purchased, and more often than not, have had to throw away. I have no doubt this travesty is easily avoided in bigger households, but because it's just me and my cat, I usually try to purchase ingredients I can get in small quantities, and this recipe is an example of that philosophy put into practice. I'm also not a fan of doing dishes, especially when I'm cooking for one, so this keeps the mess and the work to a minimum.

Here's the super simple collection of ingredients you'll need:

Big fan of Italian bread! The crunchy texture exterior with the chewy interior
when toasted is awesome.

I start by frying the egg in a little bit of oil...butter works too. 

Sunny side up eggs are the best.

In the meantime, I prepare the rest of the ingredients, which means slicing up the tomato and avocado, and getting the right amount of cottage cheese and turkey slices.


By the time you get the above ingredients ready to rumble, the egg should be done. I like mine with the yolk pretty runny, so I cook my eggs for about 5 minutes. Next, assemble the sandwich! 

Mmm. 


Look at this deliciousness.

And it's that simple.

Enjoy! :)

Yield: 1 sandwich 
Nutrition: 397 calories/sandwich

Ingredients:

    2 slices Italian bread
    1/8 tbsp light butter
    1 egg
    6 slices turkey breast
    1/2 roma tomato
    1/4 cup low fat cottage cheese
    1/4 avocado, pitted and sliced    

Instructions:
  1. Heat olive oil in a small frying pan on low heat, and carefully crack egg over pan. Cover the pan and allow the egg to cook for about 5 minutes, if you like your yolks runny - adjust as necessary.
  2. In the meantime, prepare the other ingredients. Toast the bread, slice the tomatoes, and pit and slice the avocado. 
  3. Begin assembling the sandwich. I prefer to layer it from bottom to top as follows: turkey breast (so the bread doesn't get soggy), tomato, cottage cheese, and avocado. Add the egg to top the sandwich off and add the second piece of bread. 
  4. Slice the sandwich in half and serve immediately. 
  5. Enjoy! :)
Nutritional Information from MyFitnessPal:


1.21.2014

031 Apartment Number Wreath

With Razorback football season come and gone (it was a building year...I don't want to talk about it), I decided it was time to update my apartment wreath. I've had my Hog-themed one for over a year now and have been meaning to create a new one, inspired by the beautiful wreaths I've seen on Pinterest!

'Til next season, Hogs.

I went to the Hobby Lobby near my house and picked out my supplies. I got a vine wreath (18" diameter), a few stalks of fake flowers (red and white to keep with the Razorback theme), a wooden letter and number to match my apartment number, and Sharpie paint markers.

The haul.

I started by coloring the apartment letter and number with a white Sharpie marker. The ink was a bit more diluted than I expected it to be, so the white was nowhere near dark enough for just a single coat.

First coat!
I went in for coat number two, and it evened out the color pretty nicely!

After and before. I am not good with sequences.

I set the letter and number aside to dry, and started working on the flowers next. I first removed the stem and leaves portion from the flower, and then threaded some thin ribbon through the flower petals. I tried a variety of flower positions on the wreath, and finally tied them down when I was happy with the arrangement.

Trickier than it looks...mostly because I have hotdogs for fingers.

All done! :)

After the letter and number were "completely dry" (the packaging said to wait 24 hours...I held out for like an episode of The West Wing), I hot glue gunned more thin ribbon onto the back of them. I tied them onto the wreath, and was pretty pleased with the way it turned out. Ta-daaa!

Not too shabby, eh?

A cool tip I found on Pinterest to hang wreaths easily and without damaging the door is to hang them from a hook placed upside down on the top of the back side of the door (the side your wreath WON'T be on). Clear as mud, right?

Here's an example I found on Google Images. Photo credit to At No. 64.

This allows you to switch out wreaths quickly whenever you want to, and if you use a Command Strip with the hook, the door remains undamaged when you remove it.

I strung a ribbon through the top of my wreath and created a loop long enough so that it could be hung from the hook and also be low enough on my door to reach its designated location. 

Hope you like the wreath and are inspired to create your own! :)

1.19.2014

030 Skinny Fettuccine Alfredo

One of the biggest challenges I've faced being an "adult" is not having mom around to help with dinner. Fully aware of the fact that I'm both incredibly lucky and spoiled, getting home after work and cooking has been one of the biggest changes I've had to deal with. My pre-dinner routine usually consists of me Googling or Pinteresting combinations of "easy", "cheap", "quick", and "dinner". Also "pasta". I like pasta a lot.

This week, I finally found a recipe that seemed to fit my aforementioned criteria. Most importantly, I already had all the required ingredients (this is the most important aspect of all my cooking projects, honestly). It substituted most the fattening (albeit delicious) ingredients with healthier, low-fat ingredients and promised the same delicious taste, so I had to give it a go.

First, boil some generously salted water, and get your pasta going. According to ask.com, the reason you add salt to water when making pasta is to 1) add a bit of flavor/seasoning to the pasta, and 2) bring the boiling temperature up to allow the pasta to cook faster and better. If it's on the Internet, it must be true, so do it! :)

I didn't have fettuccine at home, so I substituted it with angel hair pasta.

Fettuccine imposter.

While the pasta is cooking, you can start creating the alfredo sauce. Heat the olive oil in a medium saute pan over medium-high heat. Add the garlic and saute for about a minute until fragrant. Believe you me, I am a big fan of using fresh ingredients as often as possible, but I'm also a big fan of keeping things simple...You can substitute fresh garlic for pre-minced garlic that you can buy at Walmart. 1 clove = 1/2 tsp.


No shame.

Gradually add the flour and stir to combine. Continue cooking for a minute. Then, slowly add chicken broth, continuously stirring/whisking until you reach a smooth consistency. Add milk, and bring the mixture to a simmer. Allow the sauce to thicken slightly...


...then add the best part! The cheese!

Yep. 

Allow the cheese to melt completely, and reduce heat to keep the sauce warm. When the pasta is al dente or however dente you want it to be, drain in a colander.


Add the pasta into your delicious sauce, and toss to combine.


Keepin' it real with chopsticks, cause this is an Asian household.

Now here is where I varied from the original recipe slightly. Apparently, my boyfriend is a 5th grader, so I had to add chicken tenders to the dish. Yes - you read that right. Chicken tenders. Whipped up some frozen breaded chicken tenders I already had in the freezer, and chopped them up to add to the pasta. The adult version of this is to add grilled chicken instead, if you want the added taste and texture.


Toss the chicken with your pasta, add salt, pepper, and parsley to taste, and you have a delicious dish that takes less than 30 minutes to prepare.


Here is the recipe for your convenience, slightly adapted from Gimme Some Oven's Skinny Fettuccine Alredo. This is perfect for 2 people, if one of them has a really large appetite. :)

Yield: 3 servings
Nutrition: 319 calories/serving

Ingredients:

    4 oz fettuccine (or any pasta shape)
    2/3 tbsp olive oil
    2 cloves garlic, minced
    1 1/2 tbsp flour
    1/2 cup chicken broth
    1/2 cup low-fat milk
    1/2 cup Parmesan cheese
    4 oz frozen breaded chicken tenders/grilled chicken
    salt to taste
    pepper to taste
    parsley (optional)    

Instructions:
  1. Boil generously salted water and cook pasta according to package directions.
  2. Heat the olive oil in a medium saute pan over medium-high heat. Add the garlic and saute for about a minute until fragrant.
  3. Sprinkle with flour, and stir to combine. Saute for an additional minute to cook the flour, stirring occasionally.
  4. Slowly add chicken broth, continuously stirring/whisking until you reach a smooth consistency. Add milk, and bring the mixture to a simmer. 
  5. Allow the sauce to thicken slightly, then add in Parmesan cheese and stir until melted. Reduce heat to keep the sauce warm. 
  6. Prepare frozen breaded chicken tenders/grilled chicken according to package directions. Chop to bite size pieces, if necessary, and set aside.
  7. When the pasta is done, drain in a colander. Add pasta and chicken to sauce and toss to combine. 
  8. Add salt, pepper, and parsley to combine and serve immediately.
  9. Enjoy! :)
Nutritional Information from MyFitnessPal:


1.15.2014

029 Caramel Brownie Cookies

Time for the first baking project of the year! Yay! I decided to try out a recipe I found on Pinterest for Caramel Brownie Cookies. I've been trying to stay healthy (I've kept up with my calorie counting for 14 days in a row so far!), but with a picture like the one below, it was hard to say no. The description called this little slice of heaven a "rich chocolate-y cookie loaded with chipped mini Rolos", and they had me at "rich"...and "chocolate-y"...and "cookie"...and "Rolos".

caramel brownie cookies. duhhhhhhh.
I mean, come on.

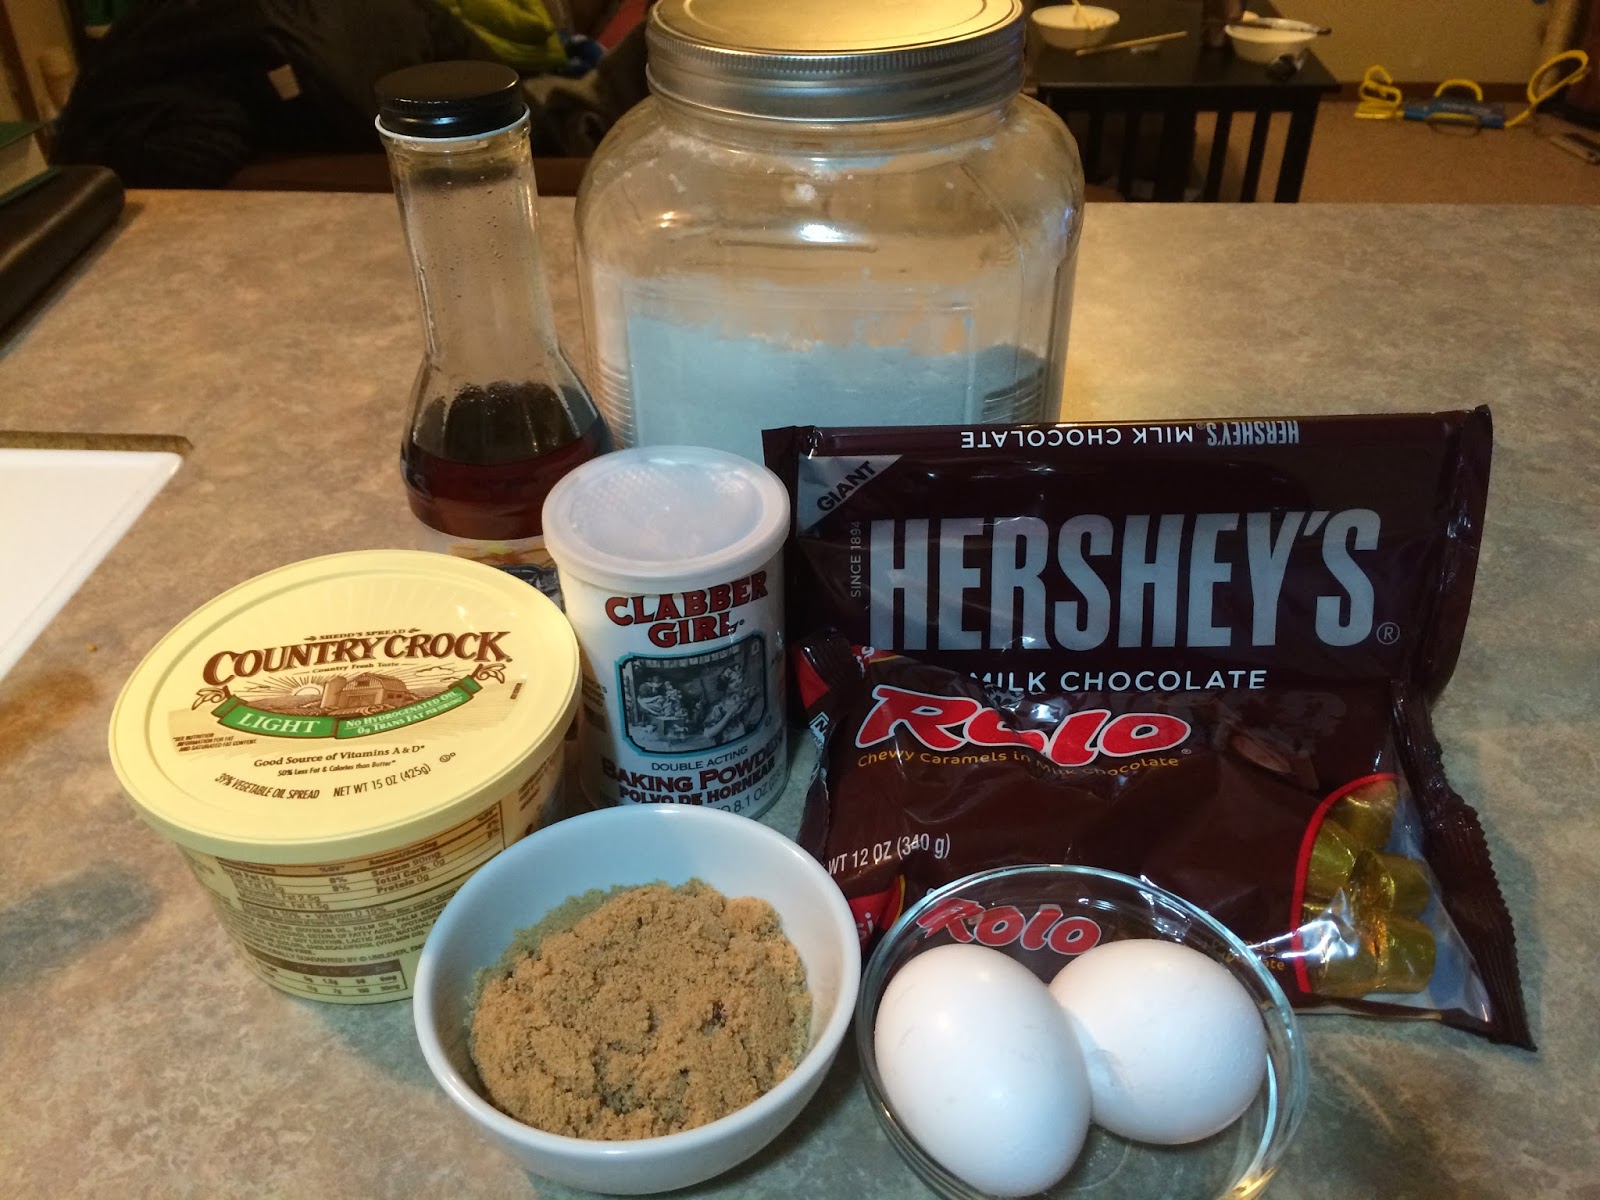
First, start by collecting all your ingredients.


I didn't have any Hershey's chocolate chips at home, so I substituted it with a bar of Hershey's milk chocolate (leave it to me to have that lying around in the pantry).

Mmm...chocolate.

Melt the chocolate chips and butter in a microwave-safe bowl.


Combine the eggs and sugar until they start to thicken. 


Add the melted chocolate and butter, and vanilla extract to the mixture. Fold in the remaining dry ingredients.


Then, it's ROLO TIME!!! Chop up the Rolos, and fold into your batter.

May or may not have snuck a few bites of this goodness.

The batter will be pretty wet, and the recipe called for it be chilled in the fridge for about an hour. I did so but found that the batter was still too liquid-y. So I went ahead and evenly divided the cookie batter in a standard cupcake pan. Remember to spray the pan with non-stick cooking spray, so you can pop the cookies out when they're done.

And voila! You have Caramel Brownie Cookies! 


Here is the recipe for your convenience, slightly adapted from the Roxana's Caramel Chocolate Fudge Brownie Cookies:

Yield: 18 cookies
Nutrition: 143 calories/cookie

Ingredients

        8 oz chocolate chips or baking chocolate
        3 tbsp butter
        1/2 cup brown sugar
        2 eggs
        1 tsp vanilla extract
        1/3 cup all purpose flour
        1/4 tsp baking powder
        pinch of salt
        1 cup chopped Rolos

Instructions:
  1. Heat the oven to 350F.
  2. In a microwave-safe bowl, add the chocolate chips and butter, and heat until melted, stirring until combined and smooth. You can also melt the chocolate and butter in a heat-proof bowl set over a pot of simmering water (also known as double boiling).
  3. In a mixing bowl, beat the eggs and sugar until they start to thicken.
  4. With the paddle attachment, at a low-to-medium speed, mix the melted chocolate into the sweetened eggs. It's important to keep mixing while you add the chocolate to prevent the eggs from cooking. Add vanilla extract and mix.
  5. Add the flour, baking powder, and salt. Stir until combined.
  6. With a spatula, fold in the chopped up Rolos.
  7. Chill the dough for 1 hour or until hard enough to handle.
  8. With a small scoop, place cookie dough on lined baking sheets, OR into a cupcake pan sprayed with non-stick cooking spray.
  9. Bake in pre-heated oven for about 11 minutes.
  10. Let cool for about 10 minutes before transferring cookies to cookie racks to cool completely.
  11. Enjoy! :)
Nutritional Information from MyFitnessPal:


1.14.2014

028 2014 Resolutions

So one of my New Year's Resolutions in 2014 is to start blogging again. I had a LiveJournal account that I kept pretty religiously when I was a teenager (full of cringe-worthy material), and have had a few feeble attempts to re-start blogging since then. The older posts in Glitter Bomb! are a consolidation of some of those past attempts, and hopefully this post will be the start of many new ones for the new year.

Glitter Bomb! will be a collection of my baking projects, art projects, and travel, as well as random events that happen in my life. I hope to eventually have some of my friends contribute posts as well, so readers can see what goes on in the life of a few 20-somethings that almost have it figured out.

For now, here are some of my 2014 resolutions! :)


  1. Create at least one new thing a month.
  2. Cook more and try at least 50 new recipes this year. 
  3. Blog at least 4 times a month.
  4. Travel internationally at least once.
  5. Run a half-marathon this year!
  6. Save more money - at least $2,500 into the savings account. 
Here's to a new blog and to new beginnings. 

p.s. This totally counts as one of my four posts/month, right? :)